


Study Desk
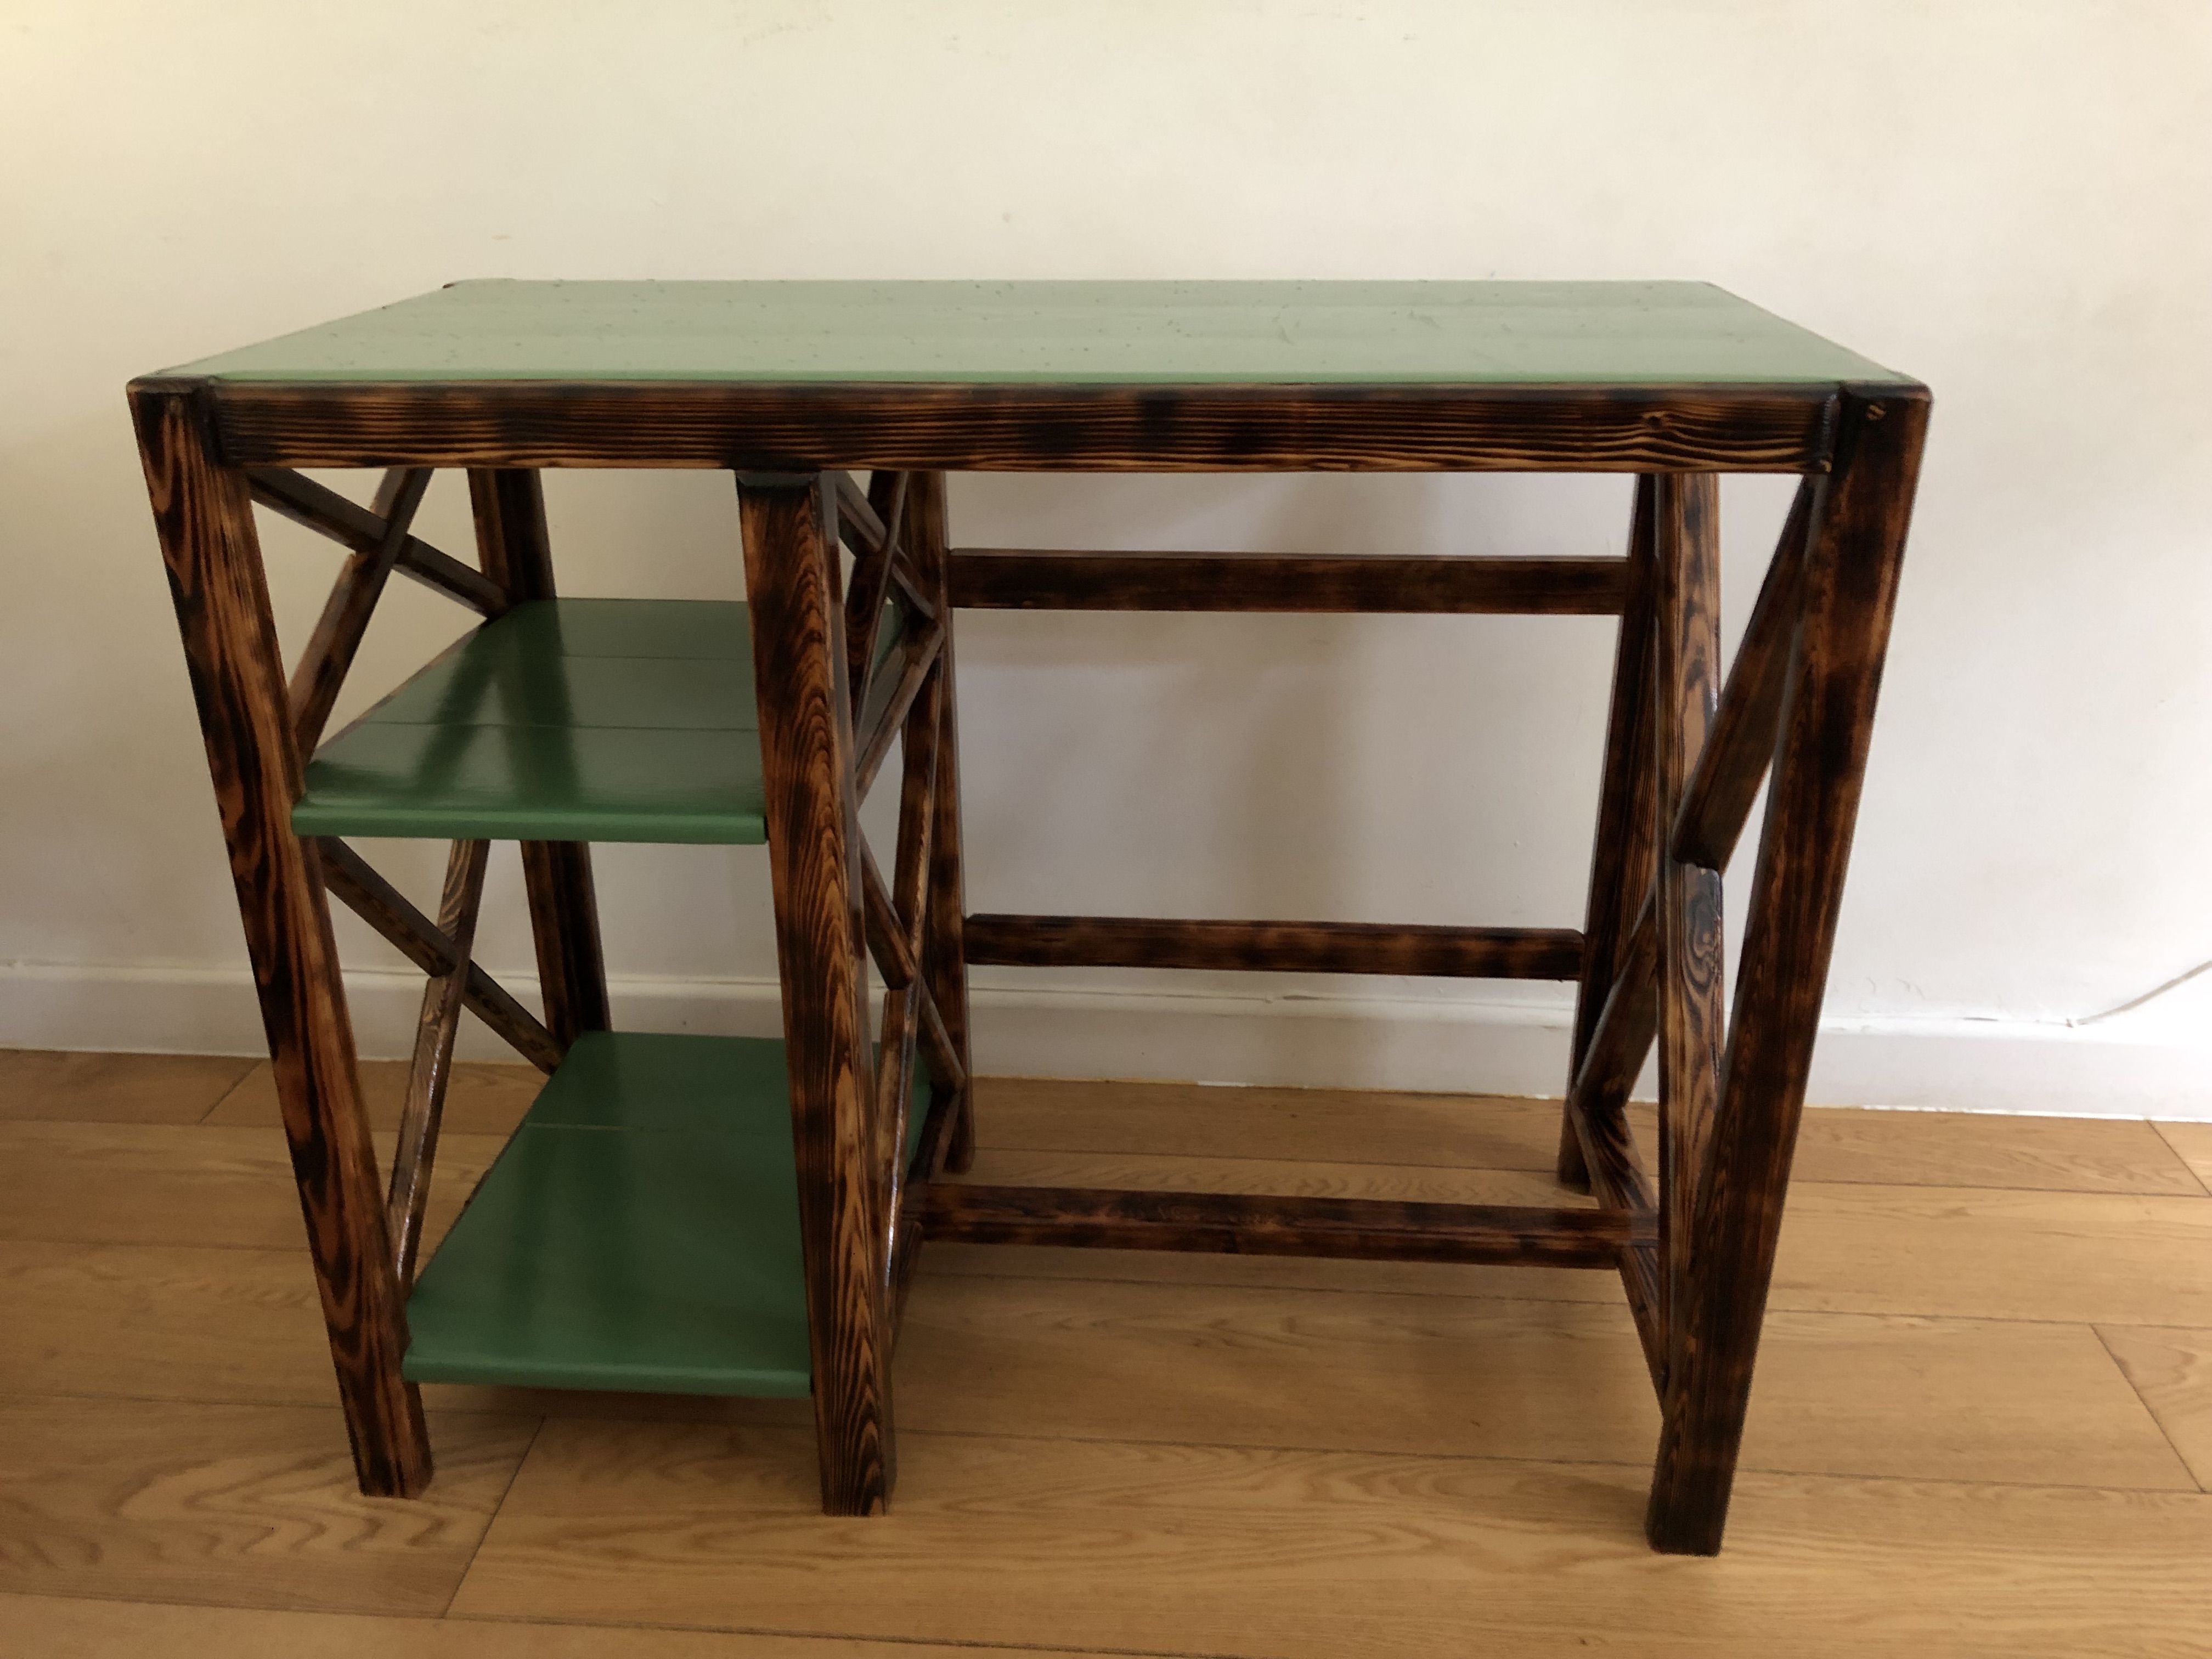
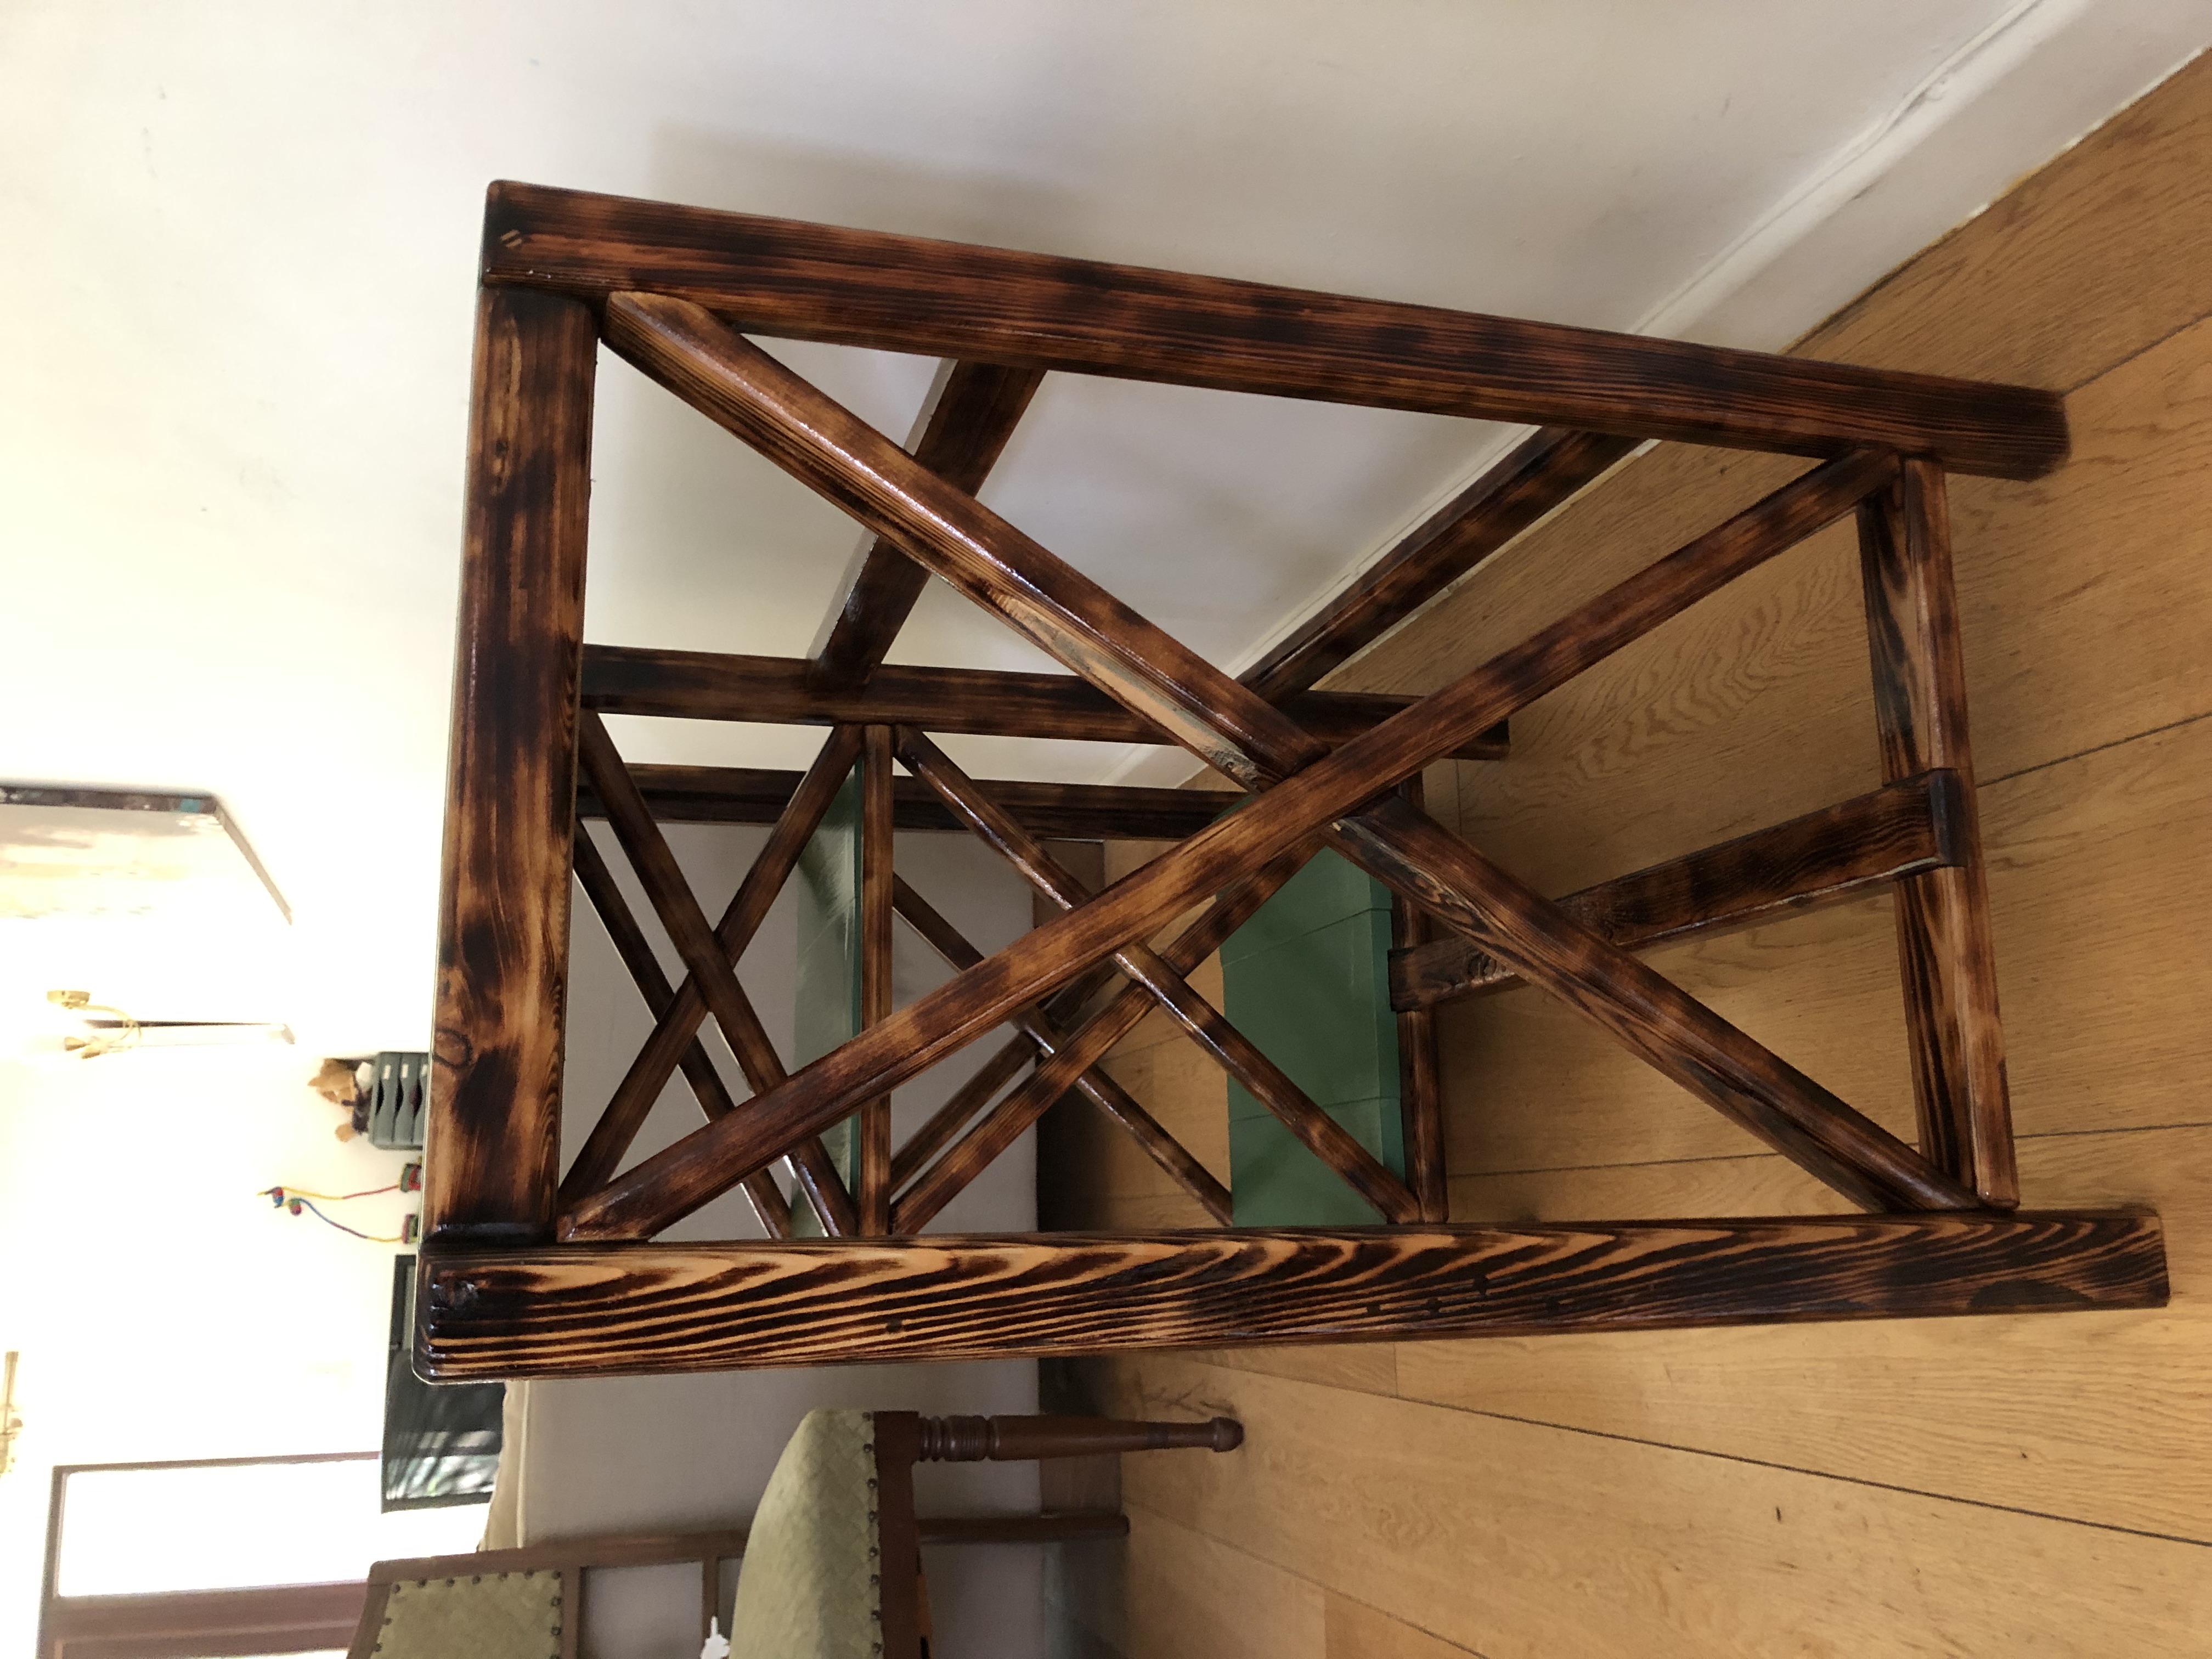

This desk was especially built for my daughter's 13th birthday. I had an idea of building her a desk as I had been given a large quantity of larch planks as barter for cutting a load of plywood for some beehives. This larch was rough cut, so needed to go through the thicknesser to achieve a uniform thickness and then cut and shape to create L shaped legs and desk top supports. Had some long lengths of angle iron to use as a mould in ensure uniformity, although this did result in some staining from the glue and iron reacting.
This was inconsequential really as I had made the decision to torch the wood, sand and then varnish. The design had to be somewhat adapted as the build continued, but this is what I love about how some projects flow; you start with a rough concept, a few sketches and then start the process, a problem manifests and then you figure out how to correct the flaw. In this case it was racking, even though the table was strong and sturdy enough, the racking was not acceptable so the design was adapted and the end result is far better.
This resulted in many more hours than I had intended due to fitting the interlocking lattices, more torching and a lot more sanding.
My daughter chose the colour and even helped to put some coats of paint on, before many coats of varnish. Usual process of; sand, and then varnish, before performing that all again once the varnish had cured. I have to admit that varnish for me is one of my favourite wood protectives, along with oil. I think it stems from hours of varnishing floor boards for our flotilla fleet of yachts. But the hours pay off; not only do you have an extremely hard wearing surface, but the almost mirror-like finish is simply beautiful, not to mention the depth of colour.
So if you notice, the legs and supports are all gloss finishes, whilst the top is matt just to add some contrast. End result; one happy daughter and one long project completed and which I am very happy with.